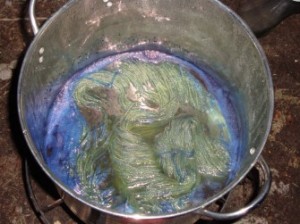
The leaves are almost all off the trees now in northern Michigan. Our biggest maple is glowing with golden leaves for just a while yet. Many of the woods are bare branches and once again a sillouette against the sky. The evenings have been below freezing on several nights and the days range from high forties to high fifties. We’ve enjoyed our first fire in the fireplace for the season. Today is overcast and raining, a great way to experiment with ambient lighting from a low light source.I decided to put to use two photography tips I had just learned. Photograph near a window and not in direct light. Place your camera perpendicular to the light source. Use your camera on low light (twilight) setting with no flash. I learned the first from an interview Jared “Brooklyn Tweed” on the Sticks and Strings podcast with David. The last tip is from the podcast Knitmore Girls, Episode 121, Hot Glue. While listening to this episode I felt your pain when discussing nupps. I too dreaded doing the nupps in the Echo Flower shawl I did and the Aeolian that I am currently working on. I found this wonderful, easy way to do nupps without tears.
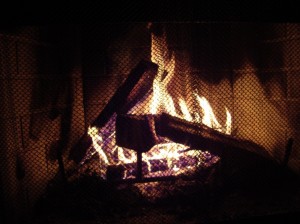
Wondering around Ravelry I saw a post about podcasts. I realized that I had not listened to any podcasts in probably a year. The hockey season has started and about after the third game in a week, I’m ready to plug in my podcast ears while working with my fiber project of the moment…and I mean moment. Taking photos this afternoon of everything I have in the works, either on the needles, hook or wheel there is a lot going on. No wonder I feel so busy.

Current spinning projects

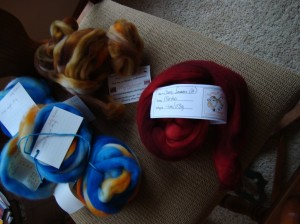
Blue and gold is a plying exercise, brown and gold on Minstrel, Cherry Season on CPW

Here’s the spinning projects at the moment I have in progress. The blue and gold is the colorway “Koi Pond” by AllspunUp on Etsy and on Ravlery. I am in the process of doing a plying exercise with this bump, hence all the sticky notes on the separate bumps. The brown and gold is Polwarth dyed by My8KidsMom and is being coordinated with a Polwarth by Southern Cross Fibres in Australia in darker shades of browns. I’m spinning both projects on my Minstrel wheel by Kromski. I’m doing each of the fibers separately in a 2 ply and then one skein will incorporate both fibers, one ply of each. Last but not least, is “Cherry Season” by Freckle Faced Fibers. The red is a beautiful cherry red merino that I am spinning on my antique spinning wheel, my CPW (Canadian Production Wheel) and creating a very fine 3 ply that I hope will be a light fingering weight for the Haruni Shawl. Perhaps the Polwarth is destined to become a hat or a scarf for a guy.  A Christmas gift in the making? All of these projects are being done simultaneously. I’m not usually this scattered in my spinning, I’m still adjusting to being a multiple wheel person. Only having one wheel I stayed more on track and monogamous with my projects. Now I feel like a spinning slut.

My first Fair Isle Sweater

Back on task with Fair Isle

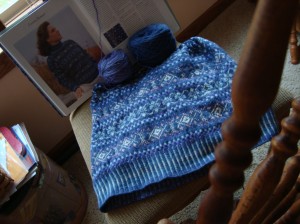
I’ve been knitting one project while crocheting another. I picked up my Fair Isle sweater started in January 2008. I had only completed one complete sequence of the pattern and now I have two and starting on another.  This pattern is in The Art of Fair Isle Knitting by Ann Feitelson.  I listened to David’s interview with Ann on Sticks and Strings Podcast, Episode #64 as I knitted on my sweater last night. I like that there was mention in the interview that there is no ONE way to knit with two or more strands….or for anything in knitting, spinning or other fiber arts. Personally I knit fair isle holding one strand in either hand. That’s what is comfortable for me. What works for you or someone else is probably different. I normally throw with my right hand (US style). I hold the background in my right and throw and the pattern yarn is held in my left and picked Continental style. There are many different ways to hold your yarn in fair isle or other stranded knitting. If you’ve tried to do color knitting and didn’t feel comfortable, I urge you to try it again, a different way and find what is comfortable for you.  I started working on this sweater to provide some stimulating knitting as a reward for crocheting a very basic baby blanket.

Crochet project

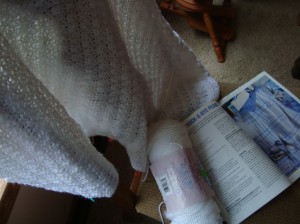
Crochet Baby Blanket

My niece recently had her third child, a boy after two beautiful girls. I started with two crochet patterns before settling on this one. The first required to much math to resize it from a regular sized afghan to a baby blanket. The second pattern was the right size but the pattern was to fussy for me to have an easy and quicker project. I did want to finish the baby blanket before the baby started school. Don’t laugh….don’t ask me about my daughter’s quilt. Anyway without any further adieu. This pattern turned out to be so easy it quickly became a bit boring. The cure for that was my Fair Isle sweater mentioned above. Once I’ve made enough progress in one sitting on the crocheting I reward myself  with a row or two of stranded knitting with two colors. It keeps my fiber pursuits much more exciting. I had hoped to finish the baby blanket this weekend. I measured last night and have 28″ so far and I need 45″ to be done. After all the white is crocheted the blue chains for the plaid are added and the border crocheted around to finish it off.  The plaid is only visible on one side. I made it in an acrylic yarn to insure easy laundry care for mom. He was born Sept. 13, 2010 so I’m already a little late.

Russian spindle with Pygora

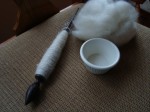
Russian spindle with Pygora

A new form of spinning for me is on a supported spindle. This one is a Russian spindle by Spanish Peacock that I am spinning some Pygora on. It took some time and practice to get it spinning efficiently. It is slow going but a great way to control the twist and drafting for some gossamer weight wool.  The Russian spindles are often used for spinning goat fiber for an  Orenburg shawl.  I could make some yarn for this type of lace project. But to spin this the traditional way I should ply it with silk.  So many other projects already waiting in the wings.

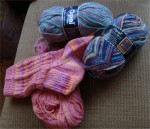
I always have a pair of socks on the needles, the portable project of every knitter. The only problem is these socks have been everywhere. I’ve only been working on them for the entire summer.  A pair of socks for my daughter  are on the needles and the two yarns for upcoming socks.

socks OTN

socks OTN

I’m reading the Yarn Harlot’s latest book (at least it’s the last one I bought),  Free Range Knitter: The Yarn Harlot Writes Again. When I’m not knitting, I’m reading about knitting and laughing along with Stephanie. Living in northern Michigan I can definitely relate to the heat wars she writes about. I am actually north of some areas of Canada….what do you think about that, eh?
Ravelry anniversary banner

Yeah for Ravelry...let's celebrate!

Wow, time flies…today marks my third Ravel-versary! I joined Ravelry on October 23, 2007, three years ago after waiting a long six weeks for my invite to finally arrive from Jess aka frecklegirl.  It was about six months after Ravelry was publicly announced that I found out about the site while trying to find knitting information by Googling on the web for a pattern or yarn or something….much like Jess had done before Ravelry was born.  Jess spent so much time trying to find other knitting information on the internet on other peoples blogs and shared her frustration with Casey aka CodeMonkey. He, being the programmer, conceived of a internet community that would be full of knitting, crochet and other yarn-ness that would make a fiberholic feel like they were home.

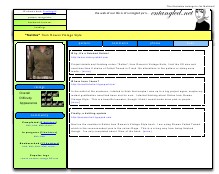
Today when I received a happy birthday message from a fellow Raveler I was curious as to why, as my birthday is in May. When I looked at my profile I realized that today is the day that I joined Ravelry in 2007. I decided to celebrate and travel back in time to the beginnings of Ravelry itself. I visited Jess’ profile and read her old blog entries that chronicled the “big project” that she and Casey were working on. Here’s a prototype of Ravelry at it’s conception on April 12, 2005. Click on the screenshot for a enlarged version on Jess’ blog. This is Casey’s vision from the night before.

screenshot of Ravelry prototype

screenshot of Ravelry prototype, April 12, 2005

The concept of Ravelry was starting to take shape, but it would be another 2 years before the site was ready for the public. Ravelry was officially announced in May 2, 2007.

I don’t know about you, but Ravelry has been an incredible community and expanded my knitting, spinning, weaving, dyeing and all things fiber related experiences to a whole new level. I have learned from other Ravelers so many tips, tricks and great new ideas and inspirations that it’s mind blowing. I have made countless number of friends on Ravelry….2,552 friends as of today. I have photographed and posted 83 projects to date. I now have a knitting history that I can go back to.  I can’t begin to tell you how helpful that is at times. I recently picked up my Fair Isle sweater that I started in January of 2008. I was pretty sure I was knitting a Large size by the measurements of the finished garment. I was absolutely certain it was the large by reviewing my projects page.  I was able to figure out where in the chart I left off and start knitting again. I dyed the wool for this sweater so there aren’t any ball bands to look at. Ravelry projects had it all for my reference….how cool is that?

A day doesn’t go by that I’m not on Ravelry. I start my morning with a cup of coffee and a few minutes on Ravelry. I like to send my friends a happy birthday greeting. I  started doing this a couple of years ago and in the beginning I was able to bring up all the people having birthdays on the current day. I went page by page to find the little “friend” icon by the birthday person’s profile.  That wasn’t to bad when there were 9 or 10 pages of birthday people to go through. Now there are 20 or more pages each day. Casey has always been working to improve features in Ravelry and he made this daily task for me much simpler by adding the ability to click a box and let the Ravelry database find your friends amongst all the birthday folks. This is just a drop in the bucket compared to all the cool search features he did for patterns, yarns, and all the other neat stuff that Ravelry has evolved into.

I don’t know about you, but I wonder how the world would have been without Ravelry….I shudder to think. I am so thankful to have a great community to share my knitting forays with like-minded fiberholics. If you don’t know about Ravelry yet, then you better go here and join. What are you waiting for?


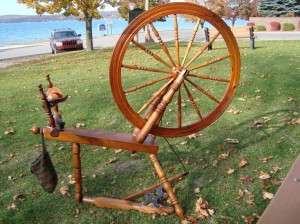
Canadian Production Wheel

My Canadian Production Wheel by Frederic Bordua


Today marks the end of Spinning and Weaving Week for 2010.  I decided to pack up my wheel and my recent natural dyeing and head out to the park and enjoy the sunshine on this beautiful fall day.  There were other spinners around but they were all on bicycles and not at spinning wheels.  I didn’t get to the park until later in the afternoon but there were still quite a few people still enjoying the afternoon. Several people stopped and talked to me, asking questions about my spinning, the natural dyeing process and my antique spinning wheel.

I have a Canadian Production Wheel made in Quebec by Frederic Bordua around 100 years ago. She’s a big wheel, 30″ on the drive wheel so she’s hard to miss. I just finished several coats of Tung oil on her this past week and I love how she glows.

I set up my natural dyeing that I’ve been doing over the past several weeks. I had quite a few questions about the plant materials I used and how I did it. Most of them weren’t familiar with Osage Orange, Logwood or Brazilwood, but when they heard I had used marigolds, sumac berries and golden rod, plants they were familiar with their interest peaked and prompted questions.


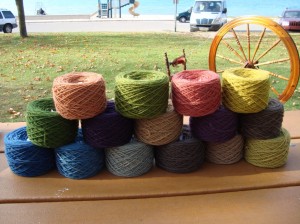
Natural dyeing on rug wool

Natural dyeing on rug wool


From L to R
Top row: madder, golden rod + indigo (1 dip), Brazilwood, marigold
Middle row: golden rod + indigo (2 dips), logwood, sumac (berry) (exhaust), logwood (exhaust), sumac (berry) with iron assist (exhaust)
Bottom row: indigo (3 dips), indigo (2 dips), indigo (1 dip), sumac (berry) with iron assist, sumac (berry), osage orange

Our spinning group has enjoyed several meetings in this park outside the pavilion. The picnic benches aren’t the most comfortable to spin from but they are the right height.  Just down the street from the park is my LYS (local yarn shop) which I frequent as often as I can. Knitting in Public is held here at the pavilion too.


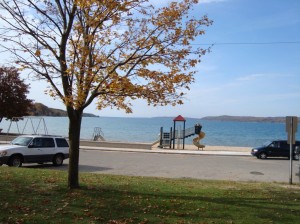
Crystal Lake in Beulah, MI

Crystal Lake in Beulah, MI


Crystal Lake feeds into Lake Michigan and the lake was created in 1873 with hopes of creating a channel to the great lake and a wide beach that would become a resort destination. The original project was considered a failure because the lake was much higher at one time and the beach they envisioned didn’t stay put. The original water line was about 50 yards from where it is now. Although they considered it a failure, I definitely think of it as a success. The lake is beautiful and on some days the water is a beautiful turquoise blue. The main road has some incredible views from atop the hills that from both the north and the south, or is that east and west? The fall foliage is pretty this year but not the breathtaking colors that it has been in the past years. The fall leaves with the sparkling waters of the lake are so pretty. I really love fall and the colors but I don’t cherish the idea that winter is not far behind.


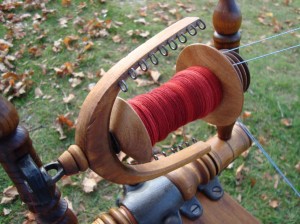
bobbin of yarn

Some progress was made today


I did get something spun today. I didn’t do the entire bobbin today but I did make some progress on it, nonetheless. It’s some merino in a color called “Cherry Season”. I’m planning on a lace to fingering weight to knit the Haruni shawl.

All in all I enjoyed a lovely day doing something I really love and sharing it with strangers. It shouldn’t have to be Spinning and Weaving Week for me to share my love of fiber arts with “muggles” (non-spinners). I would have taken my loom but being 60″ wide it’s a little hard to pack up for a day at the park.  Maybe I’ll have my rugs woven with my natural dyeing to take for next year for show and tell.

Have fun and enjoy the sunshine and the fall colors, but most of all enjoy spinning!

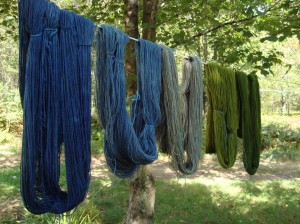
The indigo dyeing is finished and the results as promised. I’m happy with the colors that I achieved however next time for this amount of fiber I’ll double the recipe to dye it all in one vat’s worth.

All the different shades of blues and greens

All the different shades of blues and greens

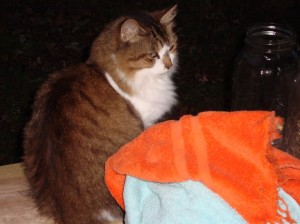
Snickers, the cat, my trusty assistant

Snickers, my trusty assistant - Photo by Joe

Snickers, my trusty assistant and I ventured into the magical world of indigo dyeing tonight.  I’ve been doing some natural dyeing the past week or so and I needed to add a couple of more colors to my palette, some blues and greens.

I used the indigo recipe in The Craft of Natural Dyeing by Jenny Dean, pgs 44-46. The recipe was easy enough to follow and I’m pretty happy with the results. It took several hours and it got dark sooner than I would have liked, sorry about the picture quality in the low, evening light.  More pictures tomorrow after the second dipping is finished.

I wish the recipe had made more of a vat to finish all the yarn I had to dye. I only did 4 skeins of 300 yds of rug yarn wool. I had two undyed skeins in a natural, jute color for the blues and two skeins were already dyed with an alum mordant and golden rod, these I wanted green.  I lacked enough liquid to get all the dips I wanted. I did two dips on one of the blues and only one dip on each of the greens. I’ll have to mix up another vat in the morning to finish the blues and greens I hope to achieve.

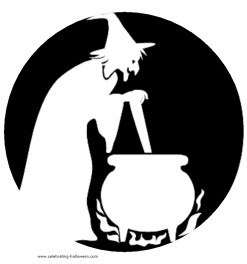
Witch's brew or natural dyeing?

Witch's brew or natural dyeing?

It almost seems like Halloween, a cat (not black), a cauldron, a stick instead of a broom and an orange towel. Halloween is only a month away, but if I waited until then to dye it would be too cold to be outside. The temperature of the vat is important, it needs to be kept around 120 degrees F. I used towels to wrap the pot and keep it warm while waiting for the Thiox to work.  Snickers liked the warm towels on the pot and wanted to snuggle up on them.  She wasn’t to happy I wouldn’t let her be more paws on with the project.

Unlike the witch in the picture, it is important not to stir the pot when dyeing with indigo. Stirring introduces oxygen to the vat and indigo dyeing requires a reduction of oxygen in the vat.  When the fiber is lifted out of the pot and the air hits it, the fiber goes from a yellowish-green to a blue right in front of your eyes. It is almost like magic…I got my husband and my son’s attention with the chemistry or the magic, I’m not sure which.

The process takes several hours and if I’d known this I probably would have stayed home from my spinning group today and taken advantage of the beautiful, sunny weather and my day off to do this all in one go.  I only needed to order the three ingredients from my favorite natural dyeing supplier, Hill Creek Studios. Indigo is available in natural or synthetic versions and comes in lump or powder form. I chose the natural indigo in powder form. It’s much easier to measure the powder and it is easier to dissolve. I listed the quantities that I purchased, not what I used for a vat recipe and the quantities are here only for reference for what I ordered.  Larger and smaller quantities are available.

2 oz. Indigo (I used natural powder)
8 oz. Soda Ash (Washing soda)
4 oz. Thiox

However, there were quite a few other things that I used in the process.  Here’s a list of stuff to gather before you head outside to dye.

A good indigo recipe
A scale that measures grams
A thermometer to register 120 degrees F
2 one quart jars (only used for dyeing)
2 two-quart jars
a chopstick
a couple of spoons (only used for dyeing)
a plastic measuring cup (only used for dyeing)
some old towels
stainless steel pot
a roll of paper towels
an old plastic basin
a long stick
face mask
eye protection
disposable gloves
heat source
a watch
a camera
cat is optional

I used the smaller quart sized canning jars to mix the indigo in one and the Thiox in the other. These jars and the other equipment I used for dye equipment only.* The chopstick was instrumental in mixing the indigo powder into a paste. The two larger jars were used to measure clean water only which was boiled in my teakettle in the kitchen and carried outside and measured. The recipe I used called for a gallon of 120 degree F water and the 2 two-quart jars helped measure the very hot water.  I tared the scale with the plastic measuring cup on the scale and then measured the amount of washing soda. I later used this for measuring the Thiox. After mixing the indigo and adding the washing soda I poured it into the gallon of hot water that was in the pot.  The Thiox was sprinkled over the surface** and the pot was left to sit. I covered the warm pot with a lid and wrapped it in three towels to keep the temperature at 120 degrees for 30 minutes to an hour.

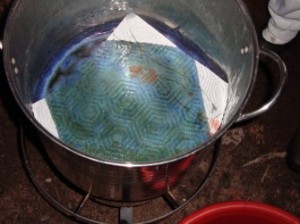
skimming the surface

skimming the surface and removing oxygenated indigo from the vat - Photo by Joe

Next take a paper towel and gently lay it on the surface of the vat mixture. The paper towel absorbs the dye on the surface that has been exposed to the oxygen in the air and turned the liquid to blue. The vat should be a yellow-green color before introducing the material for dyeing. I used two paper towels previous to the one shown here. The third towel was a yellow-green and no longer had evidence of the blue oxygenated indigo.

It’s time to start the magic! Use fiber that is wet but not dripping. Remember not to drip, stir or otherwise introduce air into the vat. The stick comes in handy here to poke (don’t stir) the fiber down into the vat until it is submerged. Put the lid back on the pot and wait for five to fifteen minutes. This is about the time the phone rings, the husband wants you to chase chickens back into the chicken coop or someone drops by unexpected. If you haven’t already put on your oldest clothes and shoes  now is the time to go and get changed. There’s a whole lot of slinging going on later when the fun starts to happen.

Indigo dyeing with fiber in the pot

Jute colored rug wool in an indigo vat - Photo by Joe

Here’s the first skein in the pot and you can see how yellow-green it is while still in the pot. Do not stir the pot, it’s supposed to be this color.

Don’t forget your gloves or you will look like a Smurf for days. I use the end of the stick to lift it out of the pot and over the plastic basin to drip. Try to avoid dripping into the pot, it introduces oxygen.  The basin catches all the excess dye and you need a place for those dye soaked paper towels. If you have on gloves and the skein is dangling off the stick take a minute to reposition it well on the stick for some action later.

You’ll start to see the color changing immediately. If you see granules of the indigo on the fiber rinse it to avoid blotchy color. Otherwise once the fiber has dripped the excess into the plastic basin carry the fiber on the end of a long stick and in an area that is not near the house, outdoor furniture or anything else you don’t want blue, wave the stick around and introduce the oxygen to the fiber. I swing the fiber back and forth and once it’s done dripping a lot I’ll swing the fiber and spin it on the stick. Now you know why old clothes and shoes are important.

Here’s a sneak peek at the blues and greens I’ve gotten on the first dip. More pictures and a brief post tomorrow to show the final results.

blue, goldenrod (before), green (after)

blue, goldenrod (before), green (after) - Photos by Joe and me

*It is very important that any jars or other equipment that is used for natural dyeing is only used for this purpose only. Keep your dyeing equipment separate from your kitchen utensils.

**Thiox chemically works only at 120 degrees F. You made need to heat the vat to 120 degrees if additional Thiox is added. Be careful, do NOT exceed 120 degrees.

Please everyone when dyeing with indigo have fun but be safe. These chemicals should be used outdoors and proper eye and respiratory safety equipment should be worn along with disposable gloves.